Showing posts with label Metal hammering. Show all posts

Thursday, October 30, 2014

The Front Nose - Damage

(p1)
(p2)
 I purchased a new 8 inch nose replacement panel to repair the center nose that normally gets smashed in at some point by some driver poor at parking. This is the Green Stuff.  It comes with a weld-thru green primer to prevent corrosion.

This is a very used front nose panel that I purchased online (p2). The unit was advertised to be used as wall-art, Go figure!  Who in the hell would use a split bus nose as wall-art?

Anyway, I had other intentions for it. I needed the section to the left of the light bucket and to the right of the bucket (p5).  The area to the right of the bucket, on my current nose was damaged (as seen in p1). The complexity of the curve didn't allow for me to straighten it out by a stud hammer. So, rather than using filler like how it was originally setup, I'll cut it out and replace it with the downer.

(p3)
I had to remove the rusty bottom, it bothered me greatly, even though, it was not my area of interest. By blocking out the areas that I want to protect with a marker, I let the cutting begin. Please see my cutting videos at the end of of this section.
(p5)

(p4)
Photos p4 and p5 shows the downer areas sized up to the location in which they will be graphed. I will attempt to repair the left-side of the light bucket with a hammer and dolly before cutting it and replacing the sheet metal.


Please see videos on the next page ->

Friday, October 24, 2014

Nose Clip Repair Plan

I have it traced out where I am going to remove the damaged area.  Before, this was filled in with filler and I tried pulling it out with a stud hammer. Because the area has a rather complex cure, the metal is not very malleable. None of the stud hammering pulled any part of it out. I will cut this part out and patch in a replacement.


I found this rather crude organ downer online. It was cheap, because it is pretty rusty, but the part I need is OK. I wish under the eye wasn't so jacked up as I would have liked to pull the who area, but once I have the cut open, I'll be able to work on the other part with a hammer and dolly.  I'll also have to pull out a small 5"x5" patch on the passenger's side.  It is not shown in the above picture, but there is a small rust hole there.

 I've also found online a nose clip that I can replace the smashed up nose area of the bus. This will handle the bang in the front.  This project will begin when I close up the side. I'll start cleaning up the downer part when I have a moment before, As I want to reduce the big elements in my garage. So I am going to do most of the cutting this weekend.

Wednesday, August 6, 2014

Cargo floor dent repair Part 2 - Updated

The floor straightening process has begun. I am forcing the van up between the support beams, starting from the closest spot the the center beam, moving my way out to the outer edges. The goal is not to get it straightened out the first run. I'll have to move across the entire floor between the beams a few times.


As you can see from this photo and the one above, the floor has already straightened out a bit already.  I have the jack in this current position over night. I heated up the metal a few times allowing for it to stretch. I will go through each space a few times. The reason for a few times is in understanding that the metal is one piece and one has to treat it as such. When on spot is straightening, it is also affecting the metal near to it.


Here is a picture of the lines so far. The area in the near left is where the jack and my jig is resting currently.


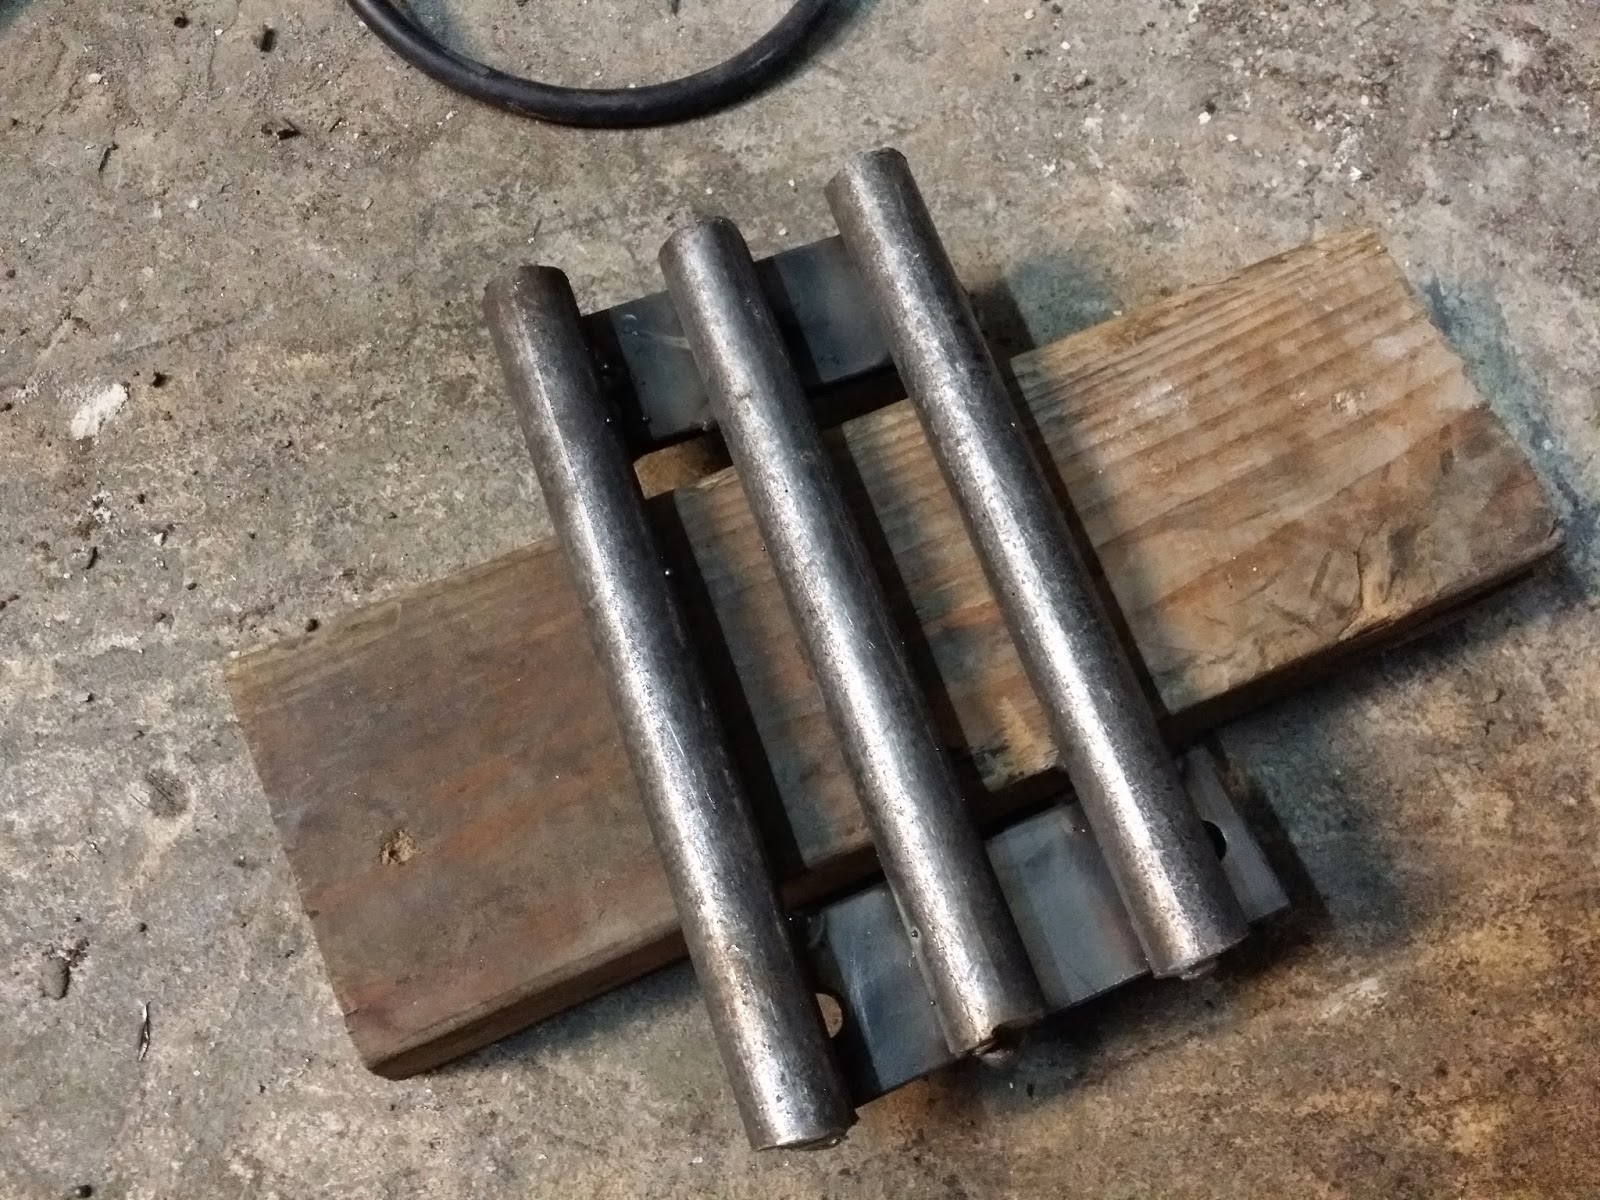
Here I had to build a mini pressure tool. This allows me to apply force on small dents and more stubborn ones that needs more direct localized pressure to straighten out the metal.

Monday, August 4, 2014

Cargo Floor dent repair - Part 1, Dent Helper Build

Today I built a cargo floor dent bender/repairer. In many spots, maybe because the driver's side had an accident long ago, the cargo floor has several bows in the in.  I don't want to replace the floor because it is in really good Texas shape.  I built a quick device to aid in straightening it out. This is spaced out to fit the grooves of the cargo floor and press it up from the bottom between the high groove marks.

Today, I just tested it slightly.  When I really use it, I will jack it up and go inside and hammer the opposite side high spots to agitate the metal so that is straightens out much easier.

This is the same photo that I posted in my last post, but this can help you see the bows in the cargo floor from the bottom view.


This is how it works. With a jack, making sure the bars fits into the grooves from underneath, jack it up to apply pressure moving the jack across the bows each time, as the metal bends itself from the underside pressure.  From the outside reaching in or from the inside completely, I will  hammer down lightly on the high spots on each side of the apparatus applying upward pressure.


From my test, you can see, it almost fixed one dent in a few minutes. I didn't get to the hammer part that helps relieve tension.

 For now, I have to make my helper rust proof.

I painted it blue from extra paint that I had around the garage.  This will help keep it from rusting, just in case I need this for another project. Hey, you never know. Maybe I'll sell this when I am done.  I love the project more than the finish car I guess.

Sunday, July 6, 2014

Deck Lid Update

Work space and Metal Shrinking disc.
Today, although the lid is feeling a lot smoother than it originally was in the beginning, after talking to a few professional body people, I realize I made a huge mistake.  When I applied the stud puller, it required that I bend the metal even more because the stud metal that was embedded into the panel doesn't shrink with a metal shrinker (neither does welds).  So, I needed to hammer the stud higher than the surface, grind them off and then hammer then back down.  Well, this caused more distortion, which is making a tougher shrinking job.  Here are some of the picture form my work today.


Side view of the (right-side area (right from rear view))
Dykem to find highs & lows
Top view of highs and lows.

After a few more hours of shrinking the high spot and raising the low spots with a hammer, it will be soon there.

This is a photo of the side view.  It shows how smooth the metal really is despite the blue dye that makes it seem really lumpy.  To the hand, it is very hard to feel most of the valleys, this is why I had to dye to see it with my own eyes.


Photo Update: 7/10/2014


Photo Update (3): 7/12/2014