Thursday, October 30, 2014

The Front Nose - Damage

(p1)
(p2)
 I purchased a new 8 inch nose replacement panel to repair the center nose that normally gets smashed in at some point by some driver poor at parking. This is the Green Stuff.  It comes with a weld-thru green primer to prevent corrosion.

This is a very used front nose panel that I purchased online (p2). The unit was advertised to be used as wall-art, Go figure!  Who in the hell would use a split bus nose as wall-art?

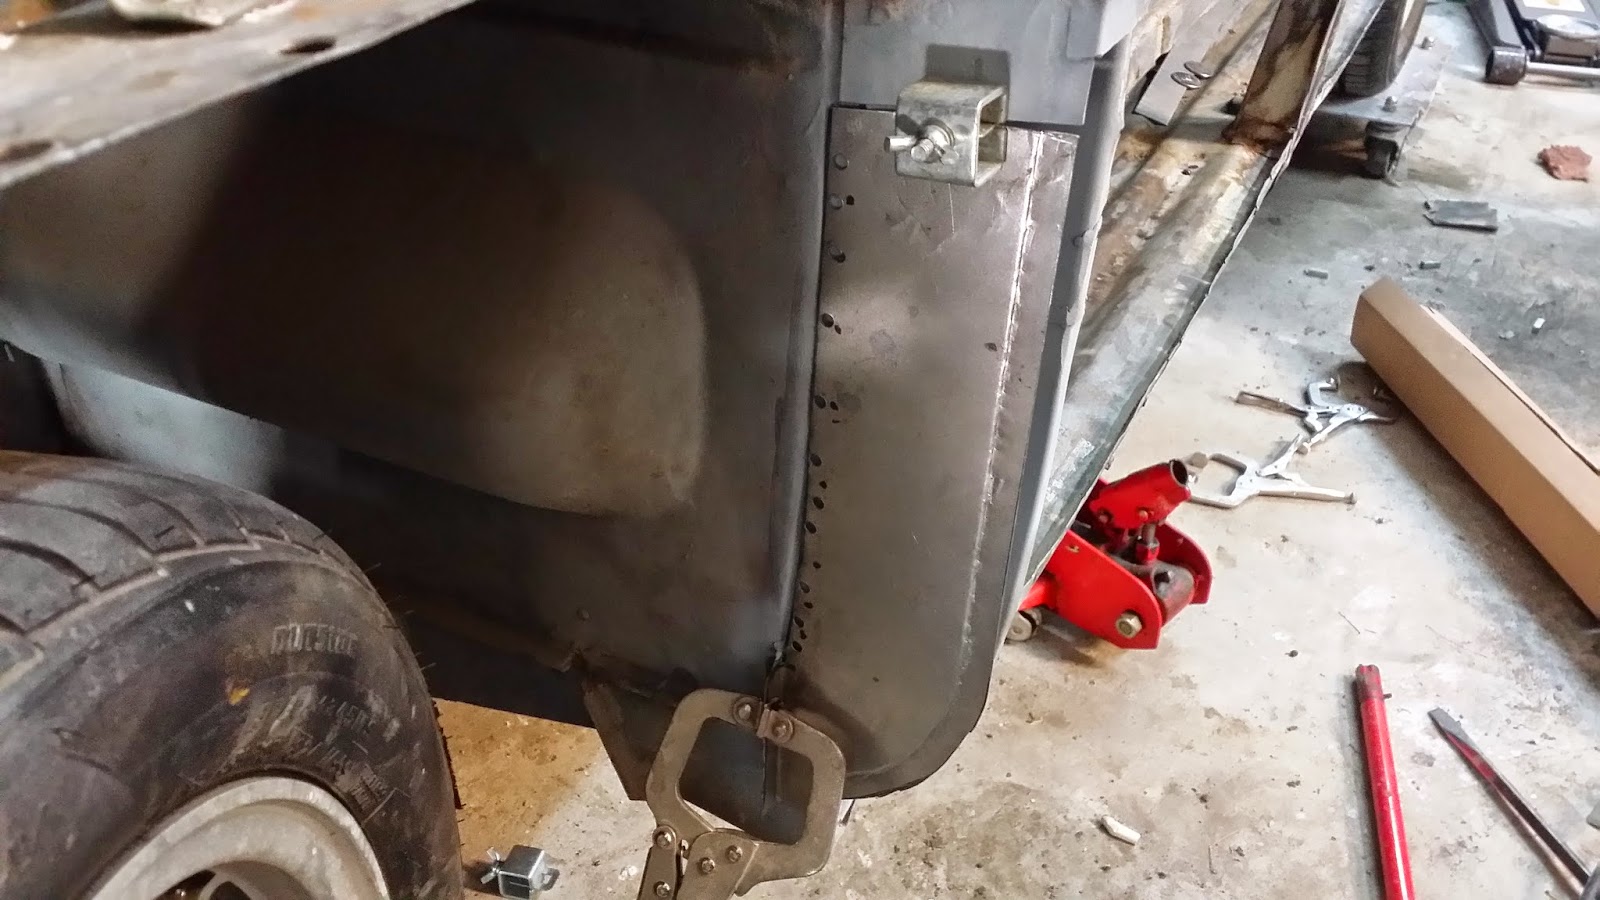
Anyway, I had other intentions for it. I needed the section to the left of the light bucket and to the right of the bucket (p5).  The area to the right of the bucket, on my current nose was damaged (as seen in p1). The complexity of the curve didn't allow for me to straighten it out by a stud hammer. So, rather than using filler like how it was originally setup, I'll cut it out and replace it with the downer.

(p3)
I had to remove the rusty bottom, it bothered me greatly, even though, it was not my area of interest. By blocking out the areas that I want to protect with a marker, I let the cutting begin. Please see my cutting videos at the end of of this section.
(p5)

(p4)
Photos p4 and p5 shows the downer areas sized up to the location in which they will be graphed. I will attempt to repair the left-side of the light bucket with a hammer and dolly before cutting it and replacing the sheet metal.


Please see videos on the next page ->

Friday, October 24, 2014

Step-up my game..

I've had this VW Bus for 1 year now.  I really need to step-up my game. By summer, I promise to have it in painting mode.  Thank god for having this blog, it helps me keep track of time.

Nose Clip Repair Plan

I have it traced out where I am going to remove the damaged area.  Before, this was filled in with filler and I tried pulling it out with a stud hammer. Because the area has a rather complex cure, the metal is not very malleable. None of the stud hammering pulled any part of it out. I will cut this part out and patch in a replacement.


I found this rather crude organ downer online. It was cheap, because it is pretty rusty, but the part I need is OK. I wish under the eye wasn't so jacked up as I would have liked to pull the who area, but once I have the cut open, I'll be able to work on the other part with a hammer and dolly.  I'll also have to pull out a small 5"x5" patch on the passenger's side.  It is not shown in the above picture, but there is a small rust hole there.

 I've also found online a nose clip that I can replace the smashed up nose area of the bus. This will handle the bang in the front.  This project will begin when I close up the side. I'll start cleaning up the downer part when I have a moment before, As I want to reduce the big elements in my garage. So I am going to do most of the cutting this weekend.

Tuesday, October 21, 2014

The inner rockers are permanently welded in. I had to remove them and straighten back out the metal, as I welded it too forward the first time. I was going to order a new one, but I thought it would be a better exercise if I fixed what I destroyed to help keep my cost down and save time waiting for the new part to come in.  Also, I've welded in the b-pillar post cover that I also had to re-work.  Hey!  I'm learning the hard way, but it is learning indeed.   I still have a question posted on a forum on how to handle the tab down on the bottom left.I believe it has to be bent over and weld closed. If I don't get a response, I'll take a look at the other side

Here is the outer rocker mating up to the B-pillar post that I fabricated. I'll have to grind down some of the arch, as it doesn't allow for my tack-weld holes to line up.  These wholes were made with a flange tool. The reverse side allows you to punch holes into sheet metal like paper. It works with a compressor. Please see the photo at the very end.

Along the top side panel, I'll have to grind down some of the ridges that doesn't allow the outer rocker to mate evenly to the bottom. This doesn't allow the weld holes punched in the bottom to mate to the inner rocker.  This will be fixed on my next visit to the garage.

Here is how the side rocker panel looks when mated up. As you can see, this will look pretty good once welded in. This will start next weekend.  I got an immunization shot on Saturday that made me feel pretty sick, so I had to stop.


Tuesday, October 14, 2014

Fixing the front B pillar post

 After trying to weld the beotch to non-weldable primer, I finally got it straightened out. This piece was fabricated in-house, as no suppler carries the B pillar cover.
 Not the best looking welds in the world but they are holding after I removed the primer and tack welded the plate in.  I've wire brushed the welds and the next photo will show it in primer.

Next I'll just have to grind down the welds so that I can close up the side rocker panel. I primed it up so it doesn't rust over the week, until my next time in the show next weekend. This is weldable primer, so that any touch ups can just be cleaned and welded.