Wednesday, August 6, 2014

Cargo floor dent repair Part 2 - Updated

The floor straightening process has begun. I am forcing the van up between the support beams, starting from the closest spot the the center beam, moving my way out to the outer edges. The goal is not to get it straightened out the first run. I'll have to move across the entire floor between the beams a few times.


As you can see from this photo and the one above, the floor has already straightened out a bit already.  I have the jack in this current position over night. I heated up the metal a few times allowing for it to stretch. I will go through each space a few times. The reason for a few times is in understanding that the metal is one piece and one has to treat it as such. When on spot is straightening, it is also affecting the metal near to it.


Here is a picture of the lines so far. The area in the near left is where the jack and my jig is resting currently.


Here I had to build a mini pressure tool. This allows me to apply force on small dents and more stubborn ones that needs more direct localized pressure to straighten out the metal.

Tuesday, August 5, 2014

Wrong Part - UGH!

I ordered a single item from Wagenwerks, a jack support for at Bus and I received a jack support for a Beetle. This kills the work that I had planned for today. The main goal was to seal up the inner rocker and to prepare for the side panel replacement.   I'm a bit annoyed by the oversight. The two looks completely different and are not interchangeable.

Beetle

Bus
As you can see, the bus jack port is completely different, it has a lip to weld the inner rockers to.

I've order parts from Wagen Werks before, and never did this happen.  I guess we are all human.  Will I order from them again?  Of course!  They have fair prices and never have there been anything wrong with anything I order but this jack part. I forgive them, only because I like their site and products. :-)  I'll think of what else I can work on tonight and recover once this is fixed and I have high confidence it will be.

The photos link to their site, as sort of a recommendation, apart from me supplying the visuals for this post.

Monday, August 4, 2014

Cargo Floor dent repair - Part 1, Dent Helper Build

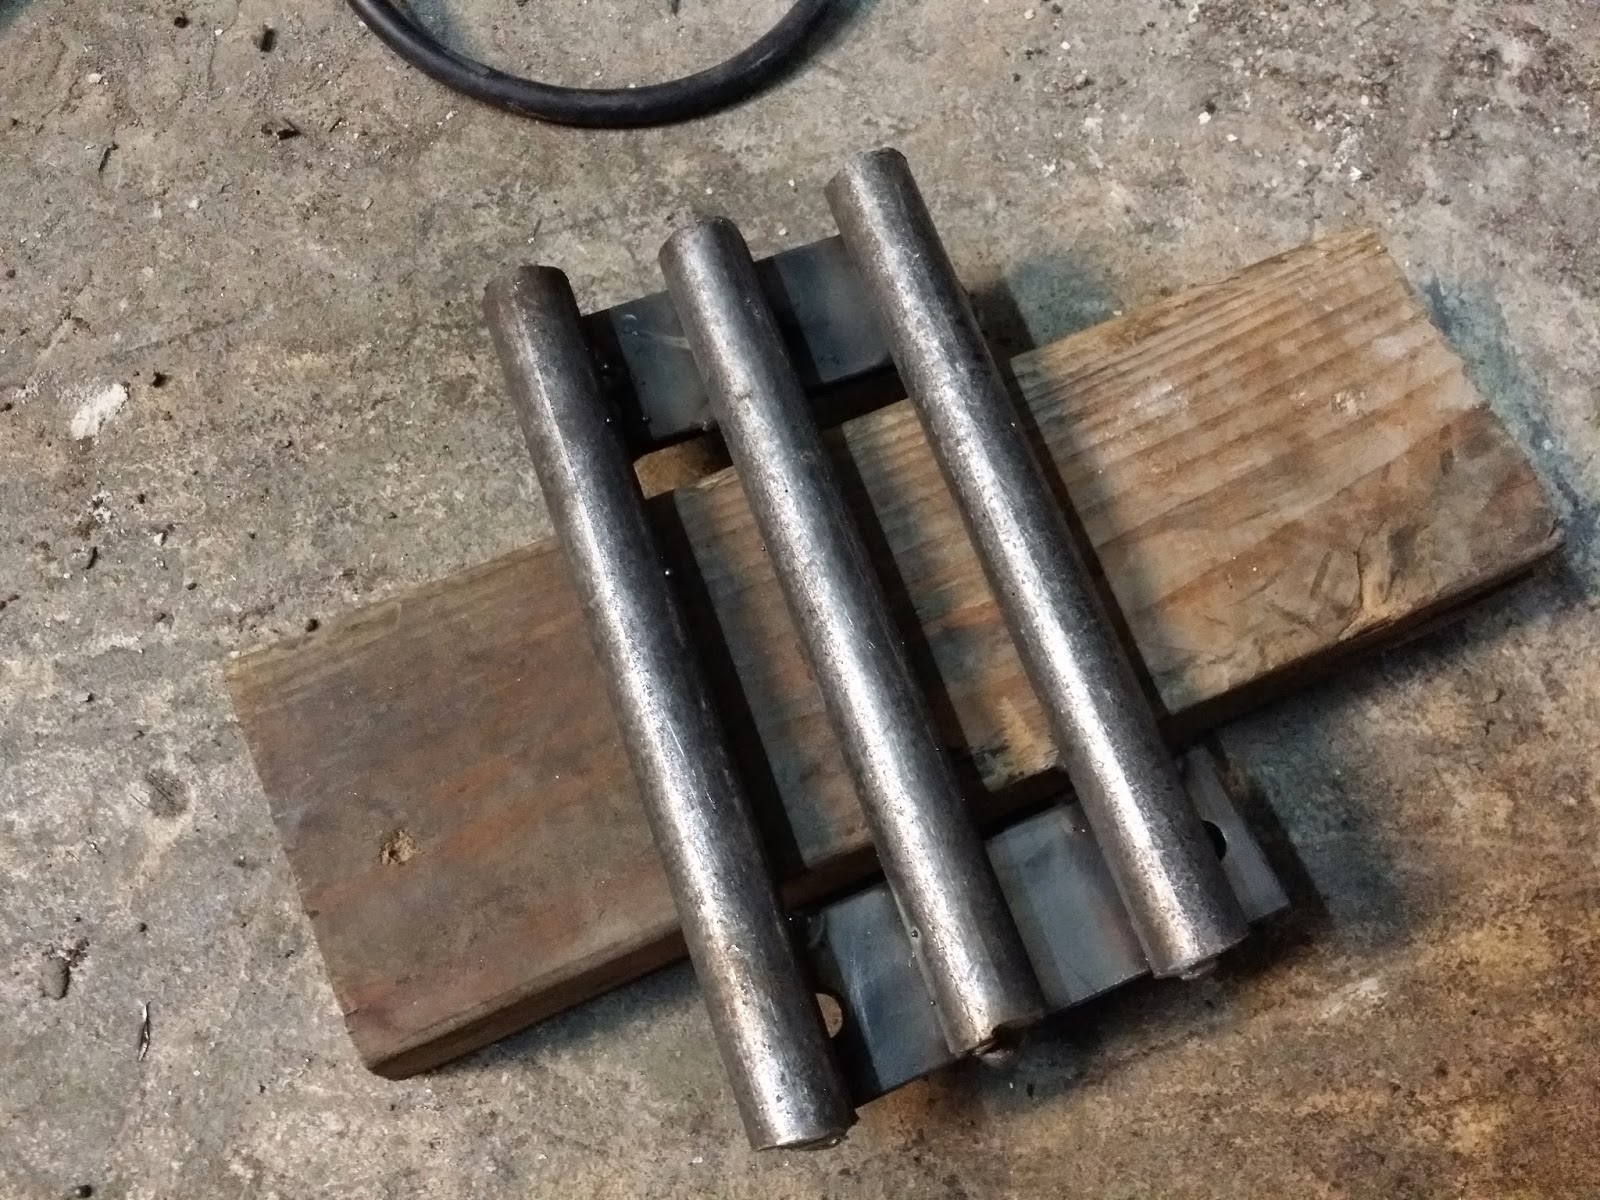
Today I built a cargo floor dent bender/repairer. In many spots, maybe because the driver's side had an accident long ago, the cargo floor has several bows in the in.  I don't want to replace the floor because it is in really good Texas shape.  I built a quick device to aid in straightening it out. This is spaced out to fit the grooves of the cargo floor and press it up from the bottom between the high groove marks.

Today, I just tested it slightly.  When I really use it, I will jack it up and go inside and hammer the opposite side high spots to agitate the metal so that is straightens out much easier.

This is the same photo that I posted in my last post, but this can help you see the bows in the cargo floor from the bottom view.


This is how it works. With a jack, making sure the bars fits into the grooves from underneath, jack it up to apply pressure moving the jack across the bows each time, as the metal bends itself from the underside pressure.  From the outside reaching in or from the inside completely, I will  hammer down lightly on the high spots on each side of the apparatus applying upward pressure.


From my test, you can see, it almost fixed one dent in a few minutes. I didn't get to the hammer part that helps relieve tension.

 For now, I have to make my helper rust proof.

I painted it blue from extra paint that I had around the garage.  This will help keep it from rusting, just in case I need this for another project. Hey, you never know. Maybe I'll sell this when I am done.  I love the project more than the finish car I guess.

Jack support port removal

 This jack support port is almost in possible to get off.  Well, not impossible, but in an awkward location.  You need to remove the welds mounted under the cargo floor and the welds to the bottom hats.  I ended up cutting it like crazy and grinding off what was left.


Sunday, August 3, 2014

Well & Rocker configuration check

Part of the wheel well was removed from the rear driver's side.  I had to also cleaned up the floor pan line that mates up to the replacement rocker panel.
I tack welded the replacement panel into place for sizing. I needed to run the inner rocker to make sure it would line up when I am ready to weld both of these pieces into their respective places.


Here is a picture of the rocker partly in place.  I had to remove the jack port, as it bent to the left and causing the rocker not to be able to sit plush against the mounts.   I removed the jack port which you'll see in a photo below (see photo below).  Also, I'm starting to clean up the lip in which the rocker will mount to the underside of the cargo floor.   But, before all of this, I need to bend the cargo floor straight as there are a few dips in the floor that would show up after painting and look bad.  I'll post he device that I am building to help with that.


Here is a complete side view of the repair work in progress.


This is the undercarriage. As you can see, it is lightly rusted. I am going to paint this rust with POR-15, which bonds to run and makes it harder than the original metal (hammer resistant). Since it seals and encapsulates, it should never rust again. Underneath will look very luxurious.  I'll cross that bridge when I get there.